Connect a camera with Device Manager
Set up your camera on the local network and send its RTMP stream to Onlooker. The screenshots below show Device Manager V5.04.07 in English.
Use Device Manager compatible with your camera. This guide follows the interface shown in the screenshots; other cameras may have different menus.
Before you begin
Download Device Manager for Windows →
Connect the camera to your router with an Ethernet cable and connect its power supply. Your computer must be on the same local network. Install Device Manager and choose English during installation.
In Onlooker, open My Cameras →, click Add Camera and enter a name. The new camera will have its RTMP publishing link. You can complete Location and Description after connecting the stream.
1. Find your camera
Open Device Manager V5.04.07 and select Device Searching. Cameras on your local network will appear in the list. If your camera is missing, click Refresh. Identify your camera by its name or IP address, then open it to bring up the login window.
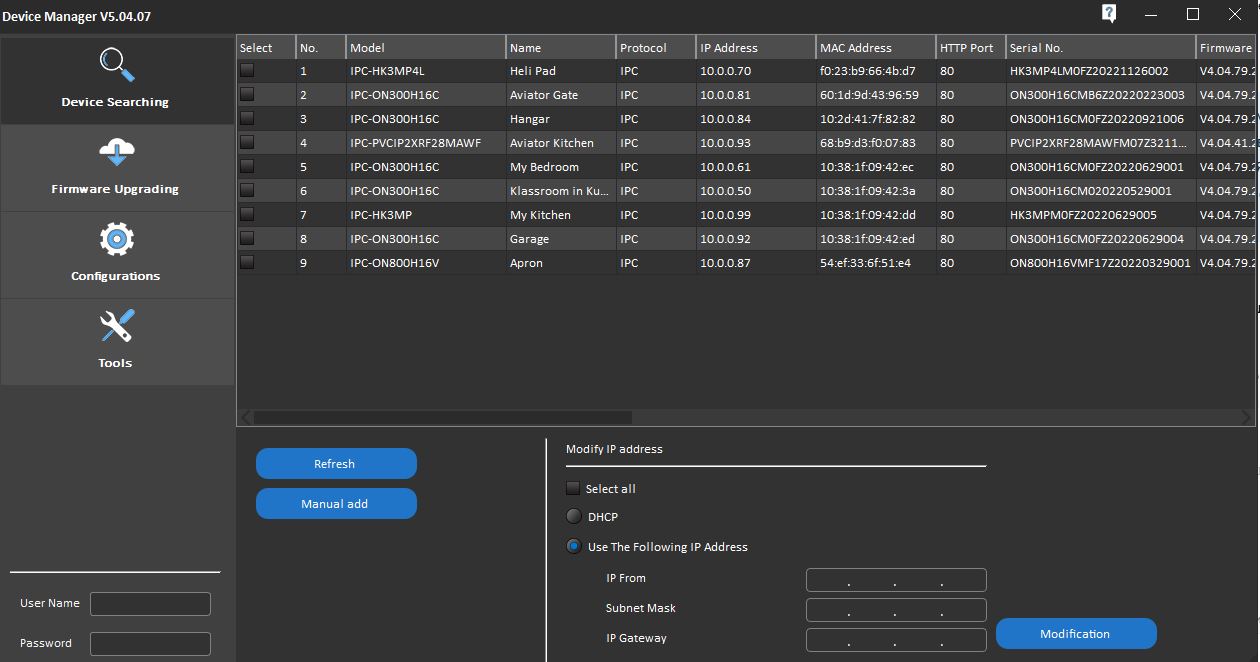
2. Log in to the camera
In the Login window, enter the camera’s username in User Name and its password in Password. Click Login. These are the camera’s credentials, not your Onlooker account details.
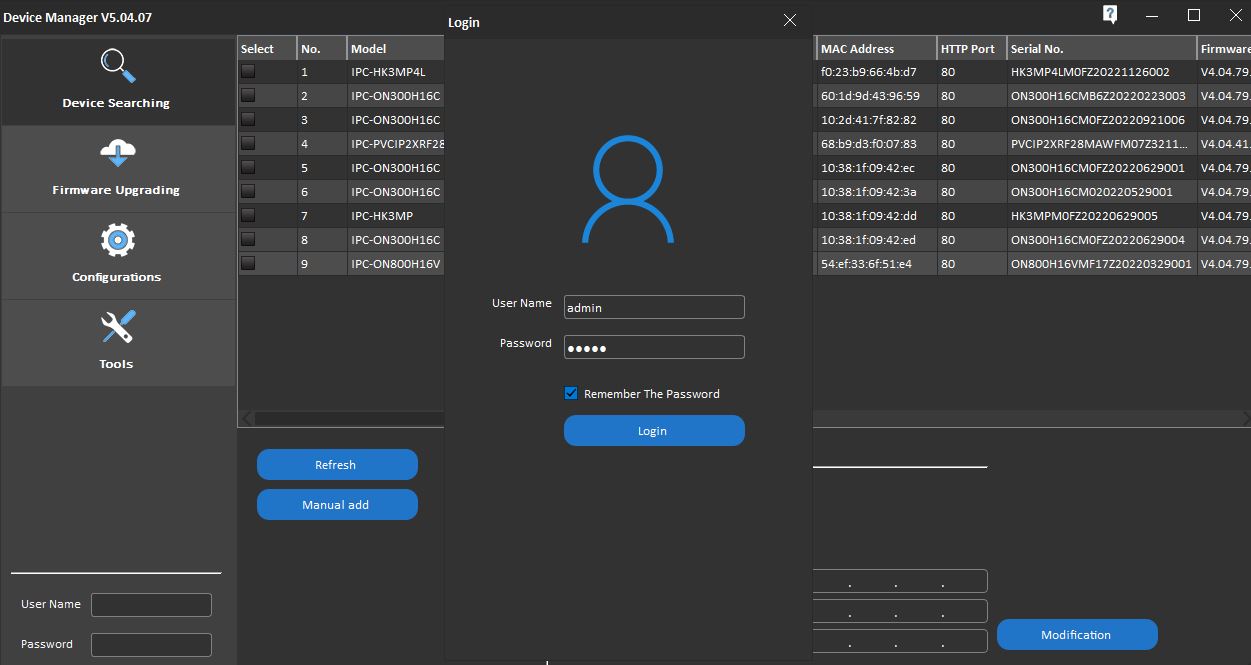
3. Check the camera image
In Camera Configurations, open Video Stream and check that the camera image is displayed. Then select Encoder to configure the video stream.
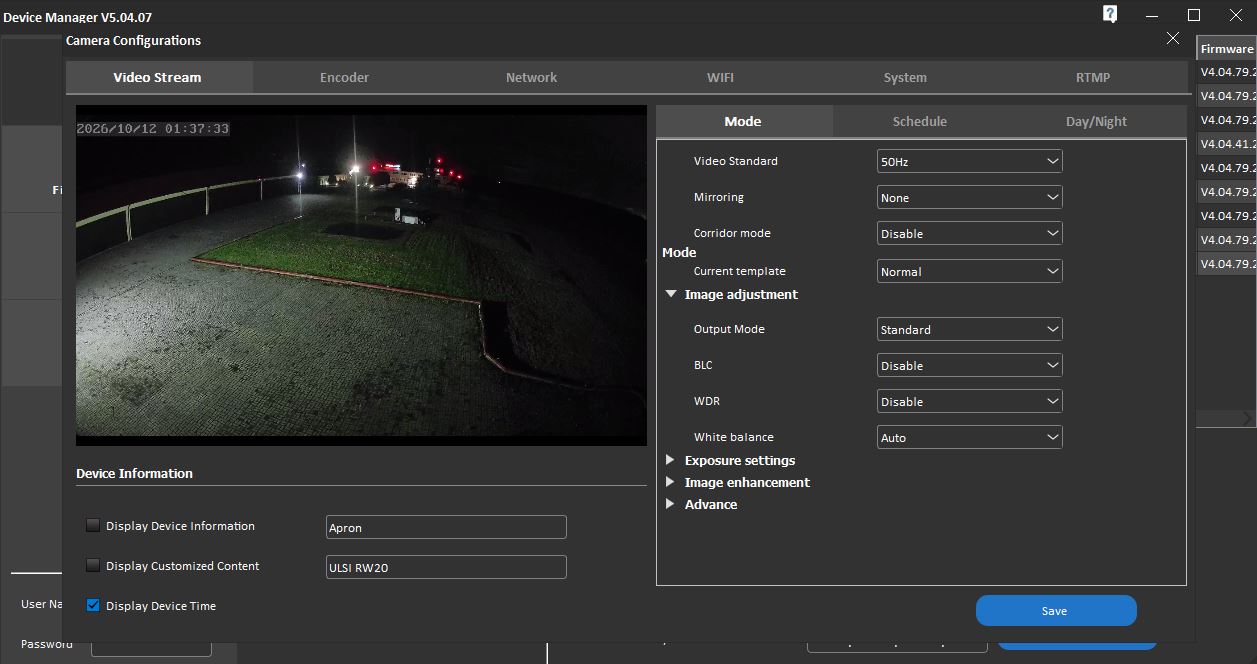
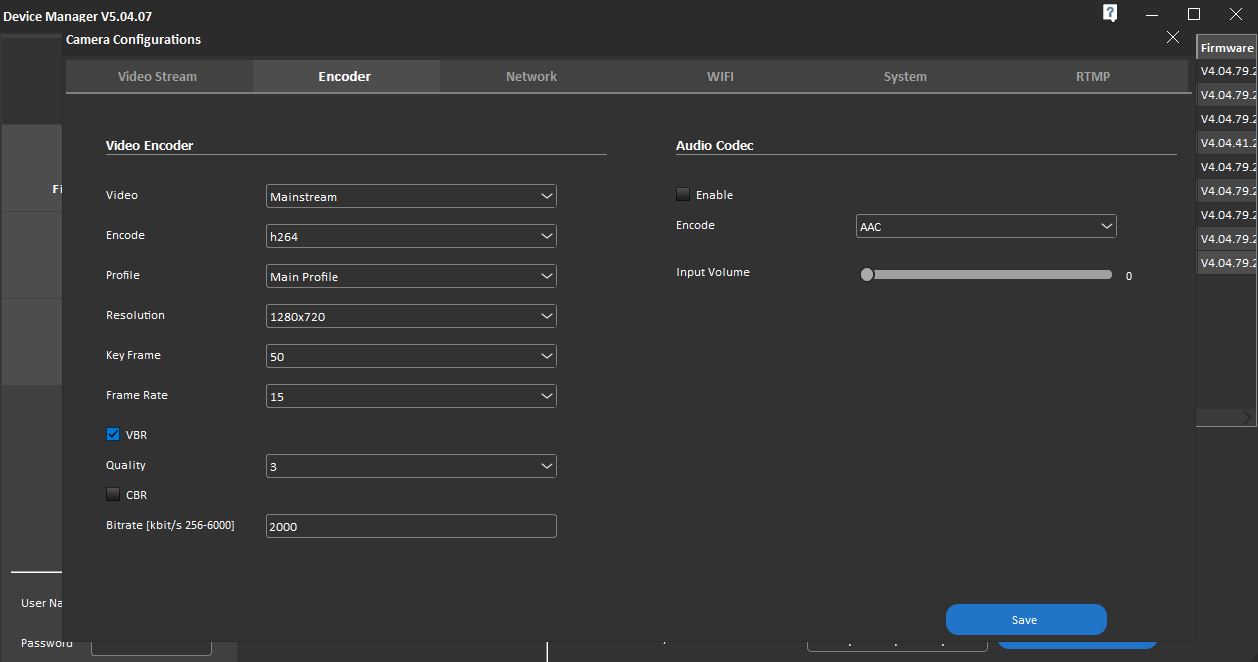
4. Configure the video stream
On the Encoder tab, select Mainstream in Video and h264 in Encode. The screenshot shows an example: Main Profile, resolution 1280×720, Key Frame 50, Frame Rate 15, VBR, Quality 3 and bitrate 2000 kbit/s. Audio is disabled. Click Save after applying your settings.
5. Configure the network and time
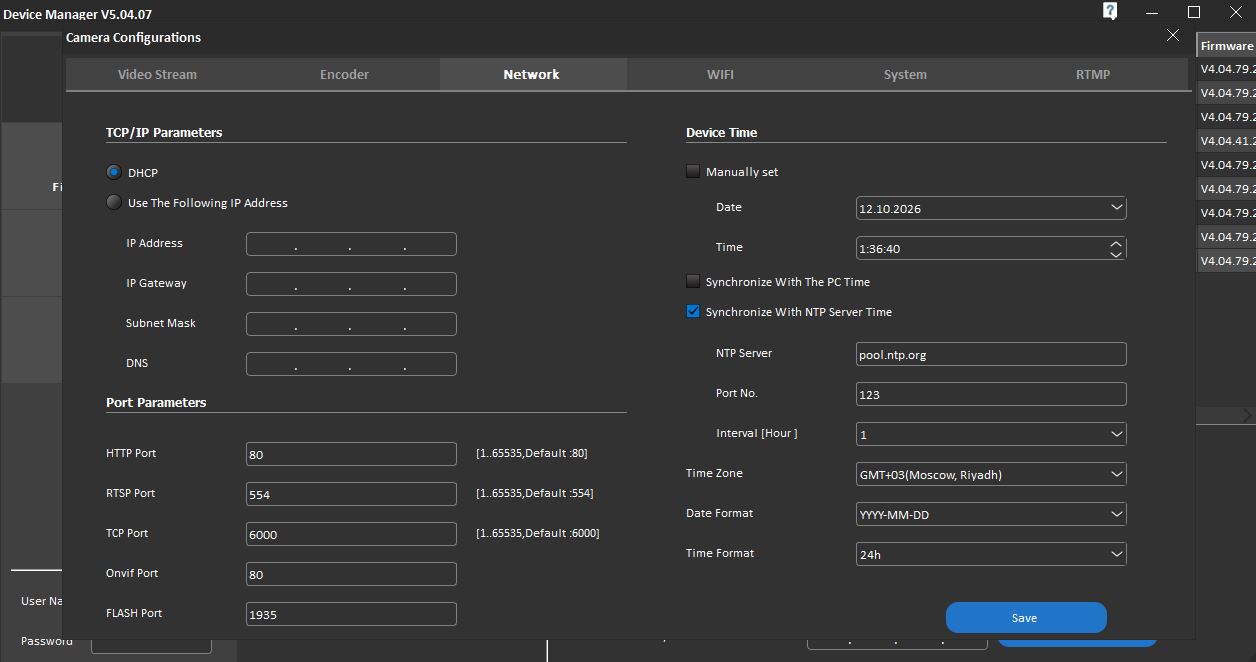
Open Network. Leave DHCP selected to obtain an IP address automatically. Under Device Time, select Synchronize With NTP Server Time and enter pool.ntp.org. Select the camera’s local time zone in Time Zone. The screenshot uses GMT+03 (Moscow, Riyadh) as an example. Click Save.
6. Find your Wi-Fi network
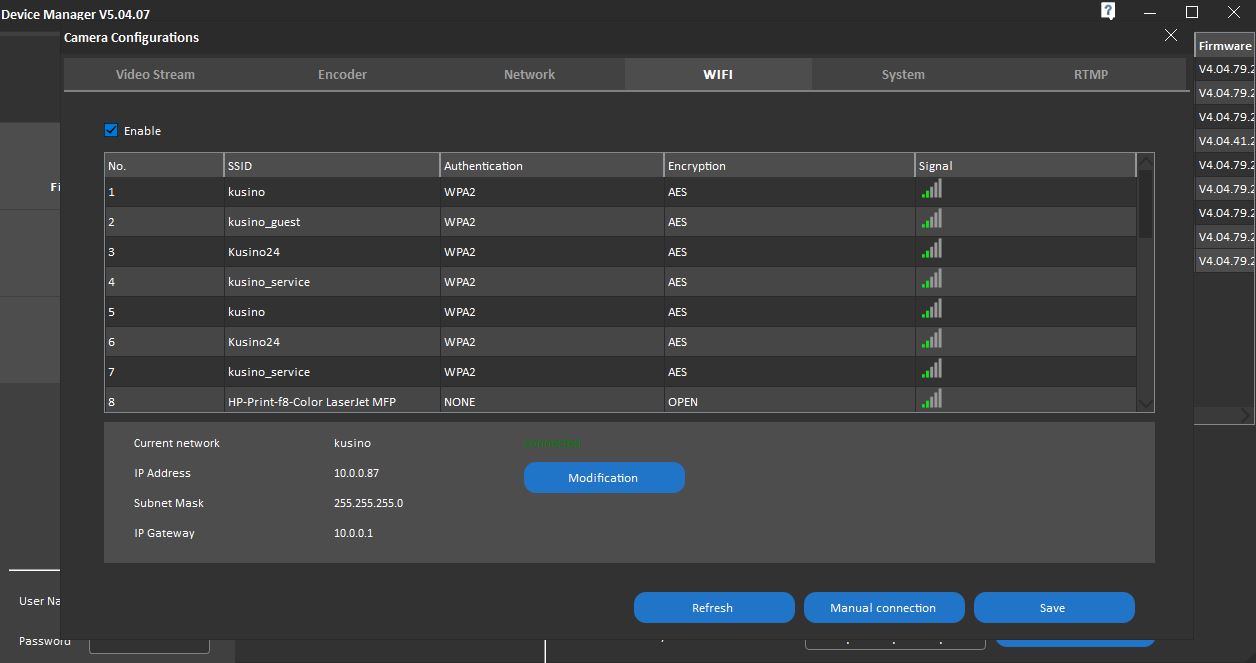
If you will use Wi-Fi, open WIFI and check Enable. Click Refresh to update the network list. Find your network in the SSID column and open its connection window. If you will keep using Ethernet, skip the Wi-Fi steps and continue to System and RTMP.
7. Enter the Wi-Fi password
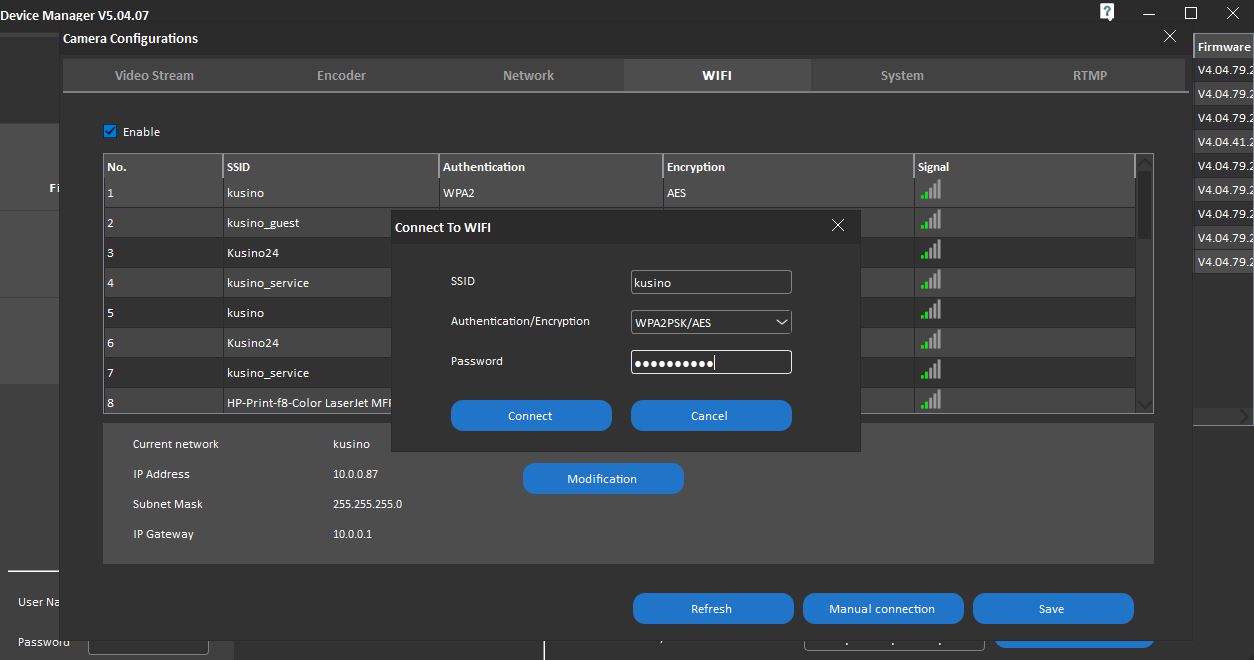
In Connect To WIFI, check the selected network name in SSID. Enter your Wi-Fi password in Password, then click Connect.
8. Confirm the Wi-Fi connection
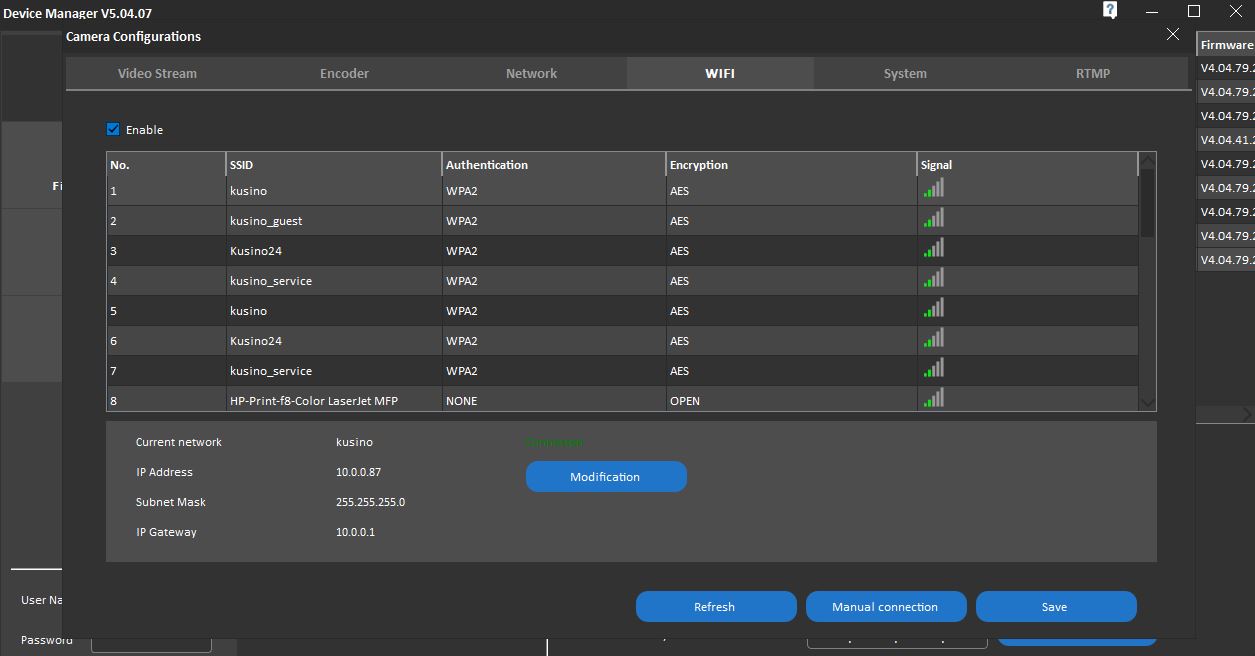
Wait for the green Connected status beside Current network. Check that the displayed network is yours and click Save.
If you want to use Wi-Fi only, disconnect the Ethernet cable after saving. Search for the camera again in Device Manager: its Wi-Fi IP address may differ from its Ethernet address. Open the camera and log in again if necessary.
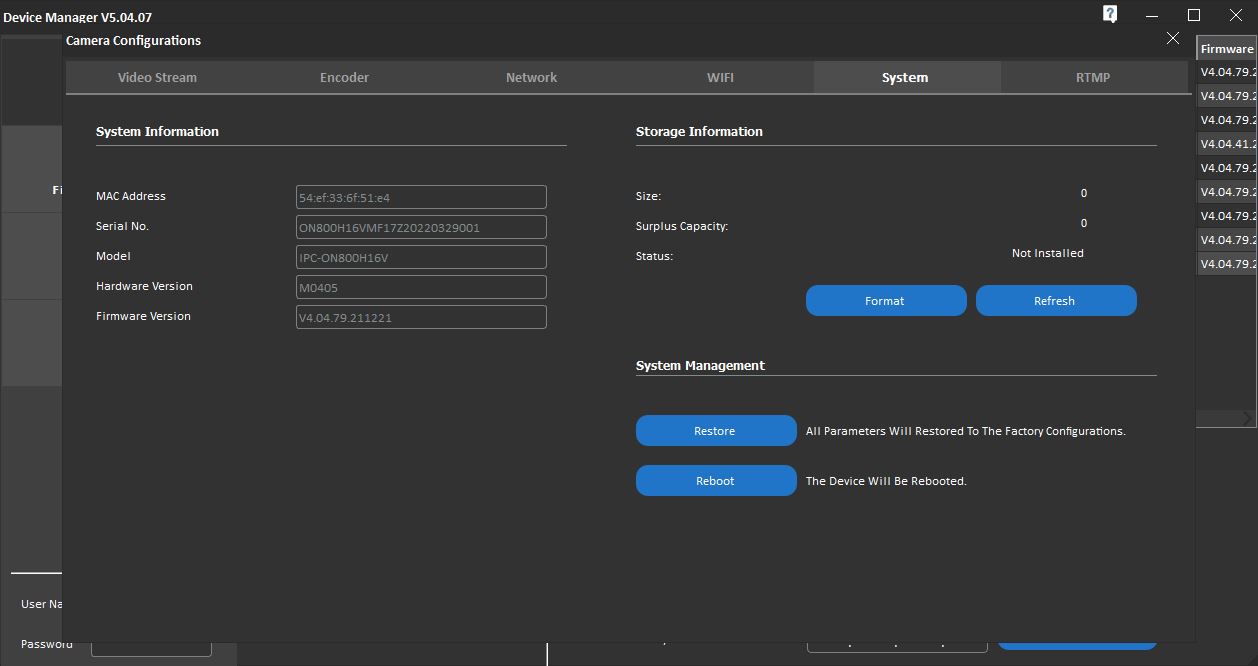
9. Check the System tab
The System tab displays camera and storage information. No changes here are needed to connect to Onlooker. Continue to RTMP. Do not click Restore during this setup: it resets the camera to its factory settings.
10. Connect the stream to Onlooker
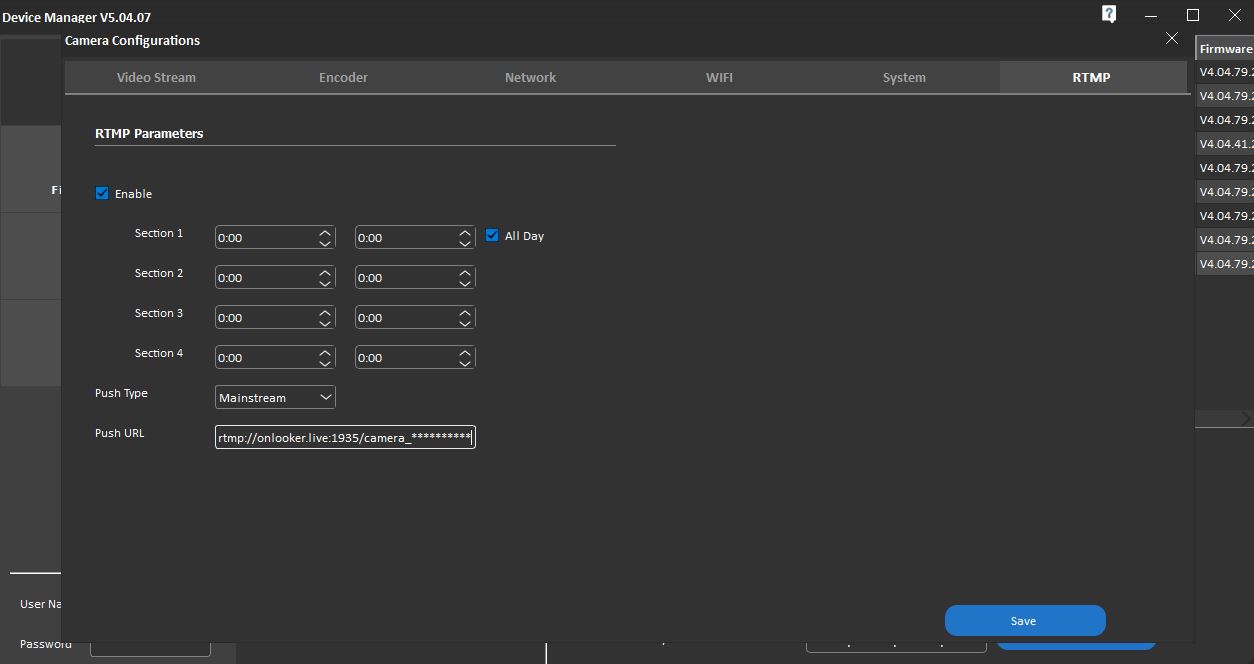
Open RTMP, check Enable and select All Day for continuous streaming. Set Push Type to Mainstream. Copy the complete RTMP publishing link → from your camera in My Cameras and paste it into Push URL. Click Save.
The private part of the link is hidden in this screenshot. Use your own complete link, without asterisks.
Final check in the camera’s web interface
Enter the camera’s IP address from Device Manager into your browser’s address bar and sign in with the camera’s username and password. Check in the RTMP settings that your complete Onlooker publishing link is correct.
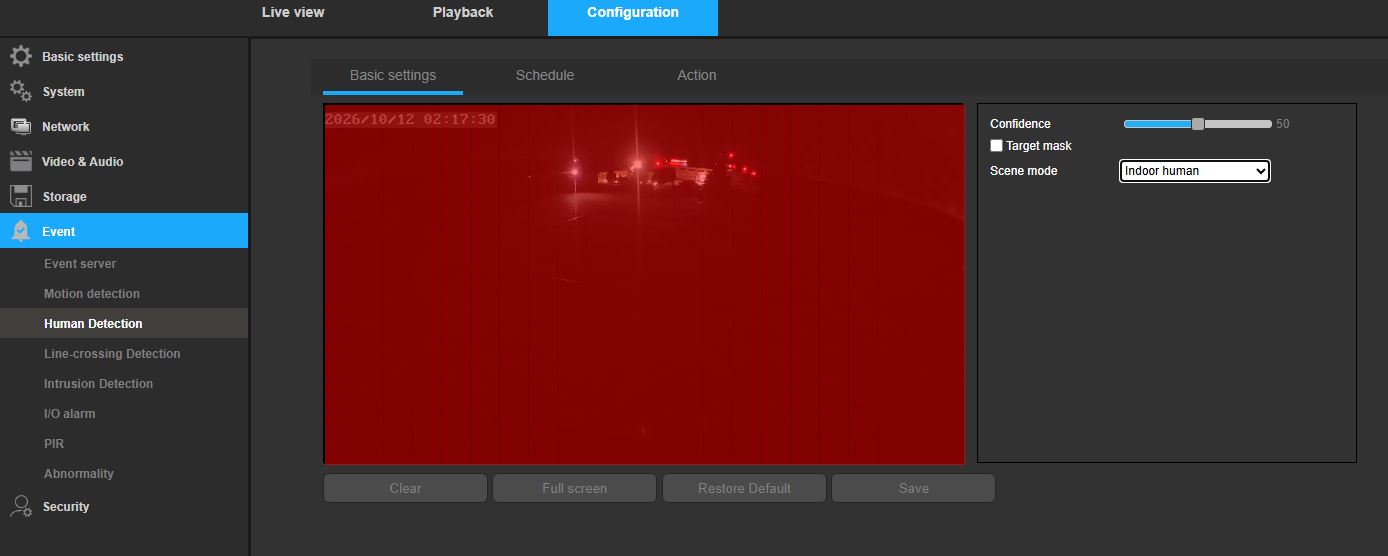
Open Configuration → Event → Human Detection → Basic settings. Uncheck Target mask to remove the moving detection frame from the video, then click Save. Leave the other settings unchanged.
Complete and publish your camera
Return to My Cameras → and open your camera.
- Fill in all required fields, including the camera’s Location and Description, and check whether it should be Public or Private.
- Click Publish to submit your completed camera profile.
- For a public camera, the status shown at the top indicates that it is awaiting moderation. After approval, this changes to Approved, displayed in green.
- Click View to open the camera and check how it is displayed.
- If you want to give someone access to your private camera, click Access and follow the instructions to grant access.
You can close Device Manager after setup. The camera sends its stream directly to Onlooker while it remains powered and connected to the internet.
Need help?
Contact contact@onlooker.live with your camera model and the step where you need help.